
Adobe no longer supports Acrobat 9.5 Pro, so as workstations get upgraded, you have two options:
- You can request a paid Adobe DC subscription
- Or you can use a free alternative, such as PDFescape
In this guide, we'll go over how to use PDFescape. While CTD recommends this alternative to Adobe DC if a paid license is not obtainable, we can only offer best effort support since it is a third party program. For additional third party support and How To's for PDFescape, please see PDFescape's support page.
Privacy
*** IMPORTANT TO NOTE WHEN USING PDFESCAPE ***
Your data is NOT private as it does get temporarily uploaded to a third party cloud system. You can read PDFescape's privacy policy here, which details what information they collect and how they use it.
Accessing PDFescape
Access the browser version here https://www.pdfescape.com/open/
Limitations of PDFescape
Note that PDF files opened or created in PDFescape must be less than 10 MB and less than 100 pages.
Open a document in PDFescape
You can create a new PDF document or Upload/Open an existing PDF.
Create a new PDF Document
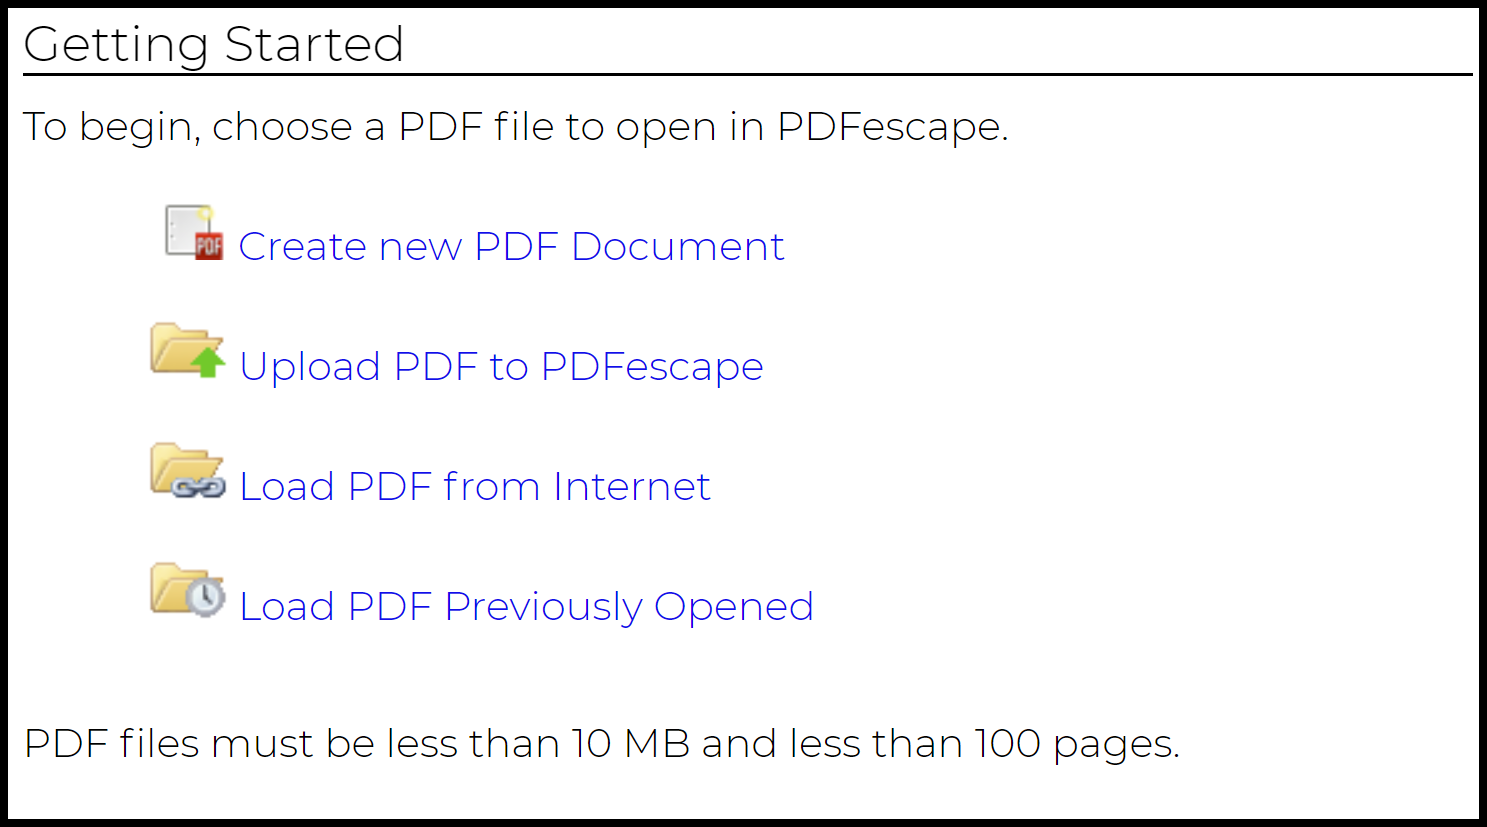
From the Get Started screen, click Create new PDF Document. You can select to create up to 25 pages. It's better to create more than not enough, as you cannot easily add new pages (you would need to "Append", or upload, a PDF document as a new page or set of pages), but you can easily delete pages.
Upload/Open a PDF Document
From the Get Started screen, open an existing PDF to edit it by clicking Upload PDF to PDFescape.
Navigating PDFescape
Once you are editing a document, at the top right, you will see the following options highlighted and detailed below:
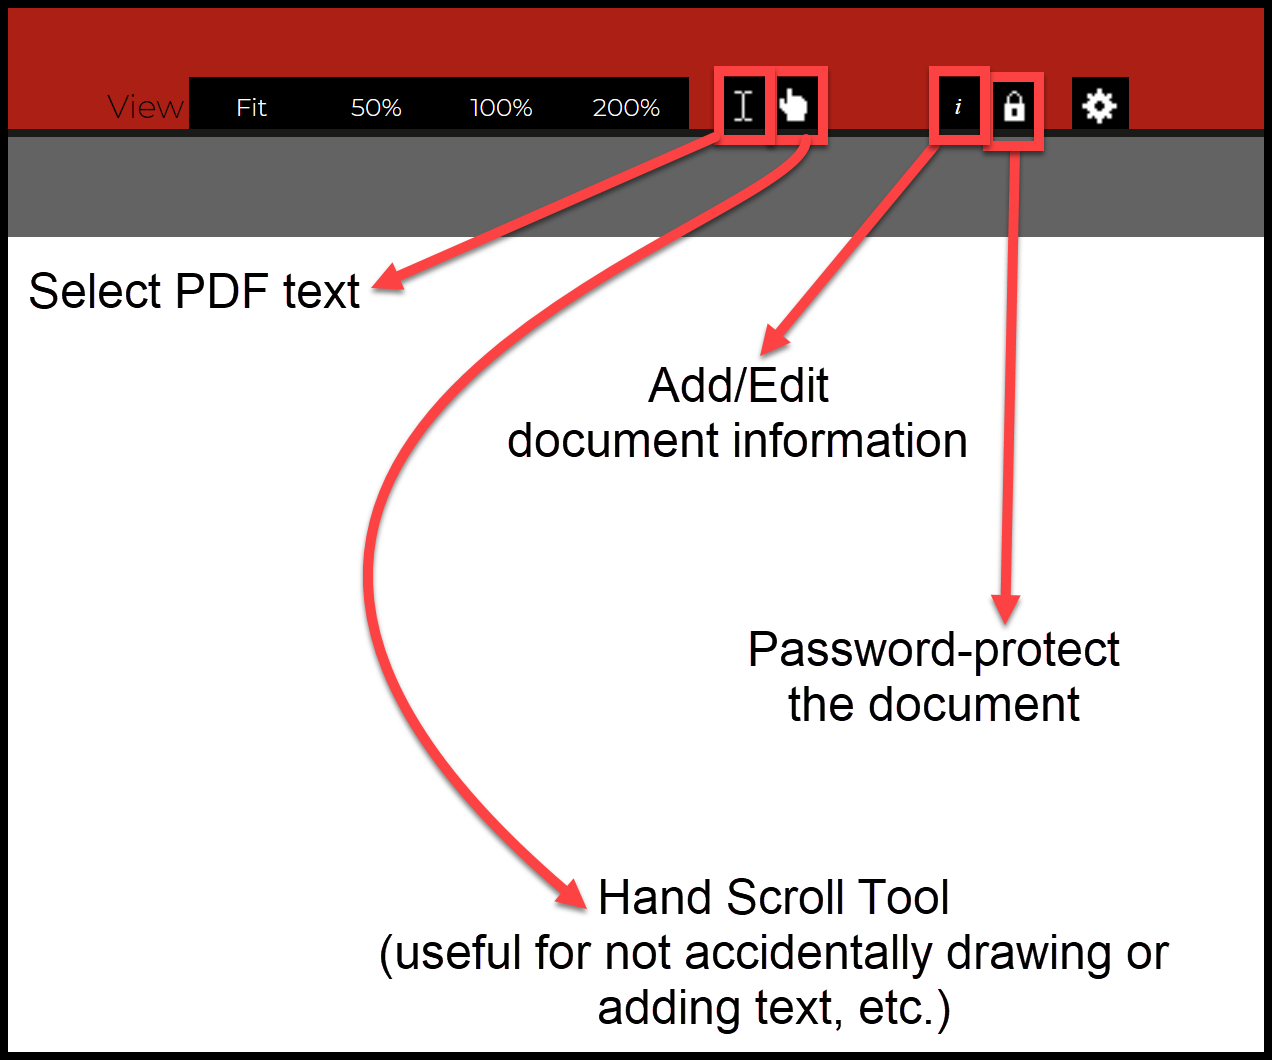
(from left to right):
- Text cursor icon: This lets you select and copy text in an existing PDF document.
- Hand cursor icon: This lets you scroll/navigate through document pages without accidentally selecting any live/editable text or drawing objects.
- (Not picture) Undo icon: When you start making changes to your PDF, an arrow icon will appear between these icons. You can click on it to Undo an action.
- Information icon: This lets you add Title, Author, Subject, and Keyword metadata to your document.
- Lock/Security icon: This lets you add password protection to your document. Don't forget this password or you will not be able to recover the contents of your file.
Similarly, at the top left, you will see the below icons:
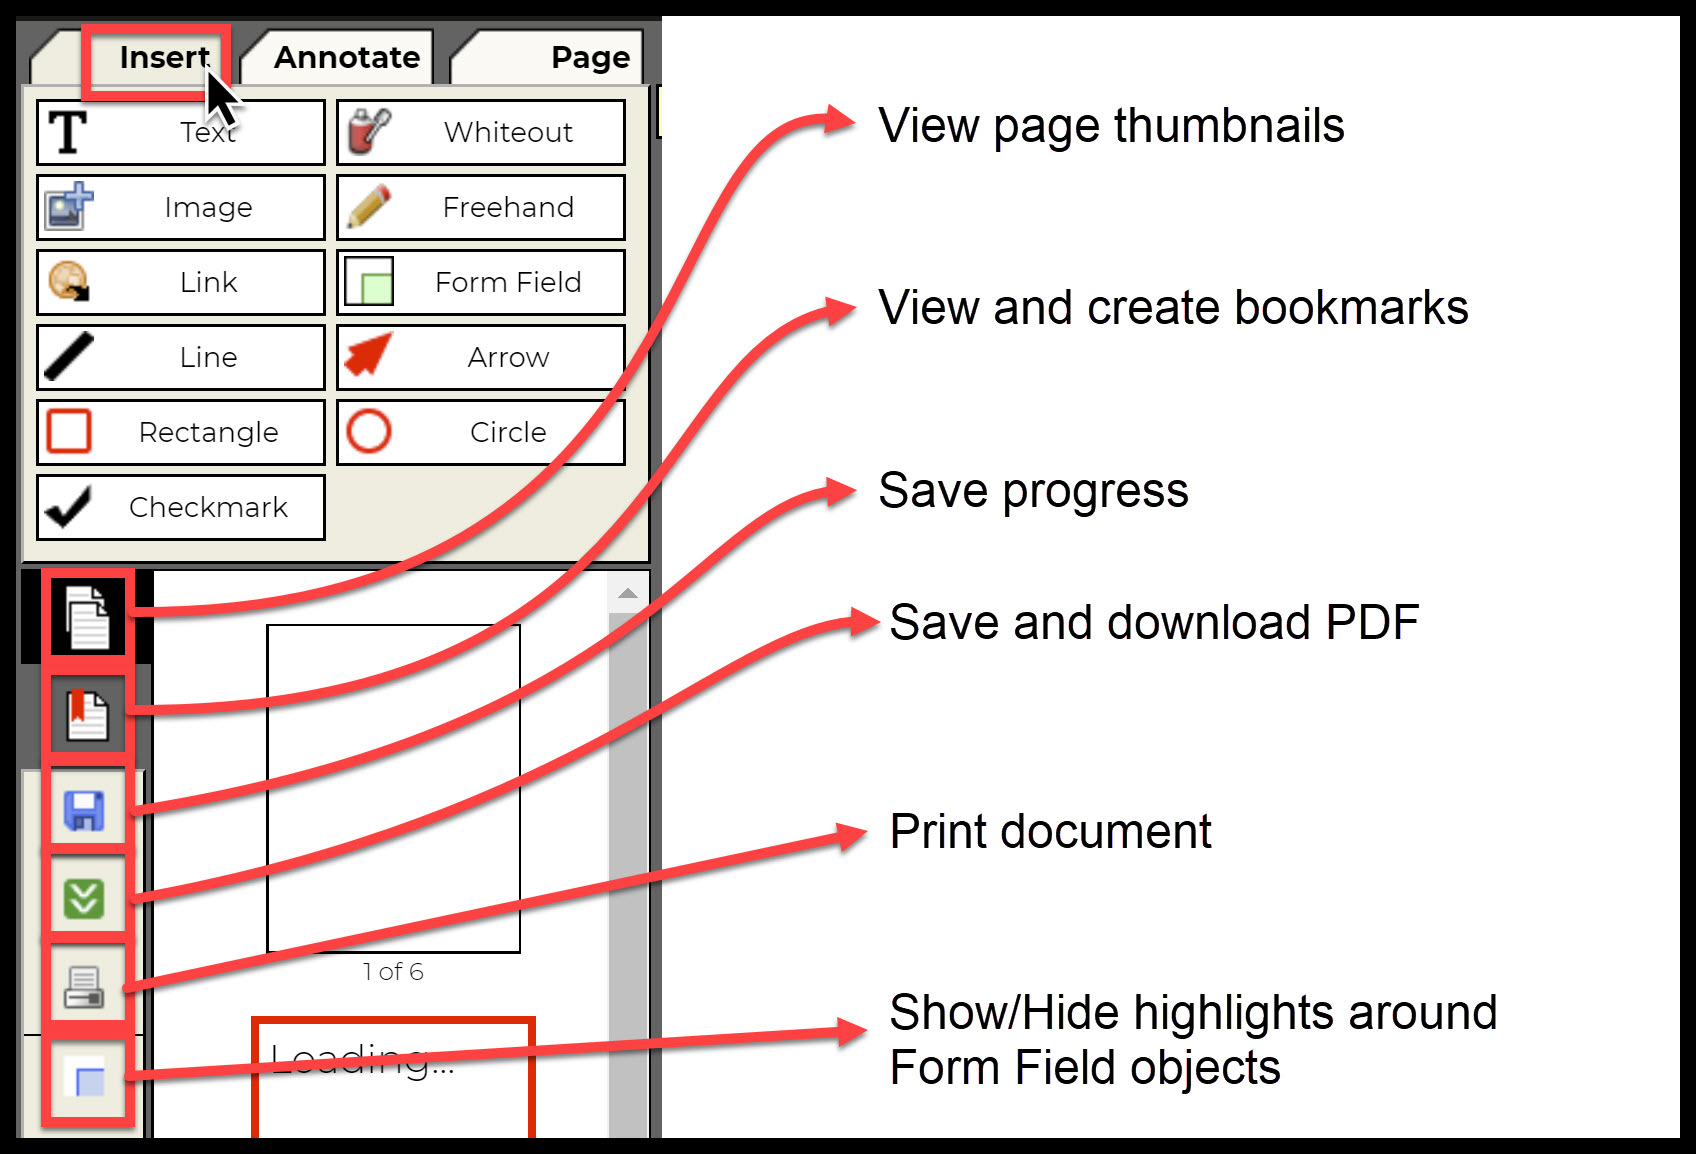
(from top to bottom):
- Tools tabs: By default, the Insert Tools tab is displayed. You can click Annotate or Page to view those tool tabs and their various features. These tabs allow you to insert text, images, lines, and more.
- Page thumbnail icon: This will show/hide the page preview panel on the left.
- Bookmark icon: View, create, and delete bookmarks
- Save icon: Click this periodically to save your progress.
- It should prevent you from closing the tab if you haven't saved your progress yet.
- If you accidentally close the tab, you can press Ctrl+Shift+T on your browser to try to reopen the page and it should open your existing document.
- Please note: CTD cannot guarantee any backups or temporary save files for third party systems.
- Download icon: This saves your changes and then downloads your PDF file.
- Print icon: This will bring up an initial dialogue box, which will then lead you to your browser's built-in printer options dialogue box.
- Form Field icon: Form field objects created in PDFescape, such as text boxes or checkboxes, are highlighted green by default. The green highlight does not show up in your final document. Toggle this icon to show the highlight when you want to identify where Form Field objects are in your document. Toggle to hide the highlight when you want to better preview what your document will look like in its final form.
PRO-TIP: Selecting and modifying objects in PDFescape
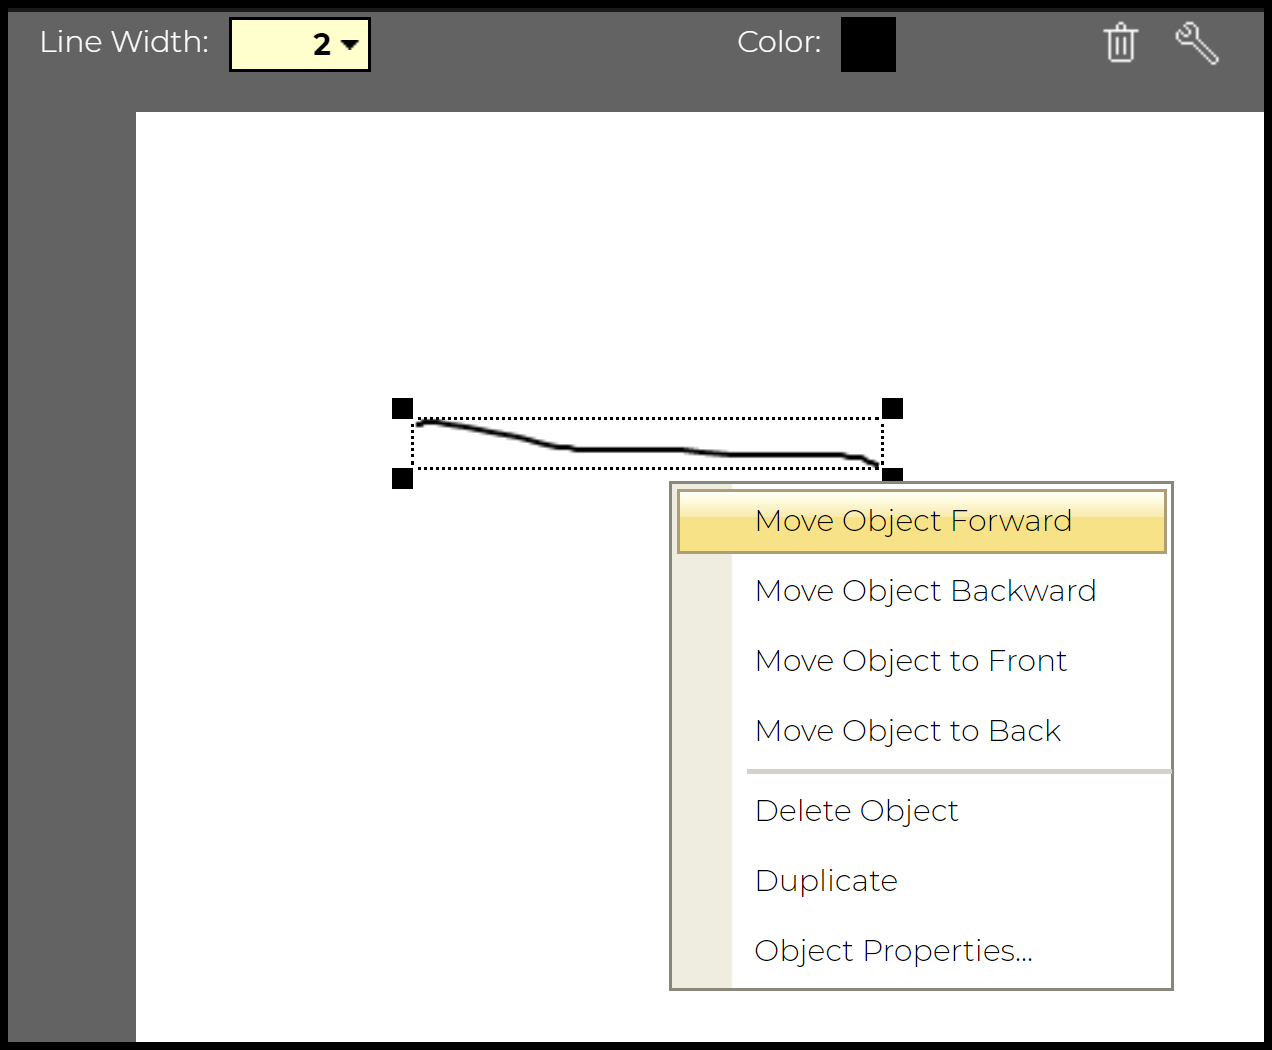
To select and modify any newly created object within PDFescape, such as a freehand line, Form Field, highlight, et cetera, simply right-click on it. Right-clicking on an object will select it and show you an actions menu. Selecting different types of objects will show you different options.
In the example below, I right-clicked a freehand line. You can see that I can move the object in front of or behind other objects, I can make a copy of it, or I can delete it. After right-clicking on it, I can then left-click and drag it to move it around. I can also click on a corner anchor point to resize it. You can see additional options at the top of the screenshot for adjusting the line width/thickness and the color of the line.
Comments
0 comments
Article is closed for comments.